

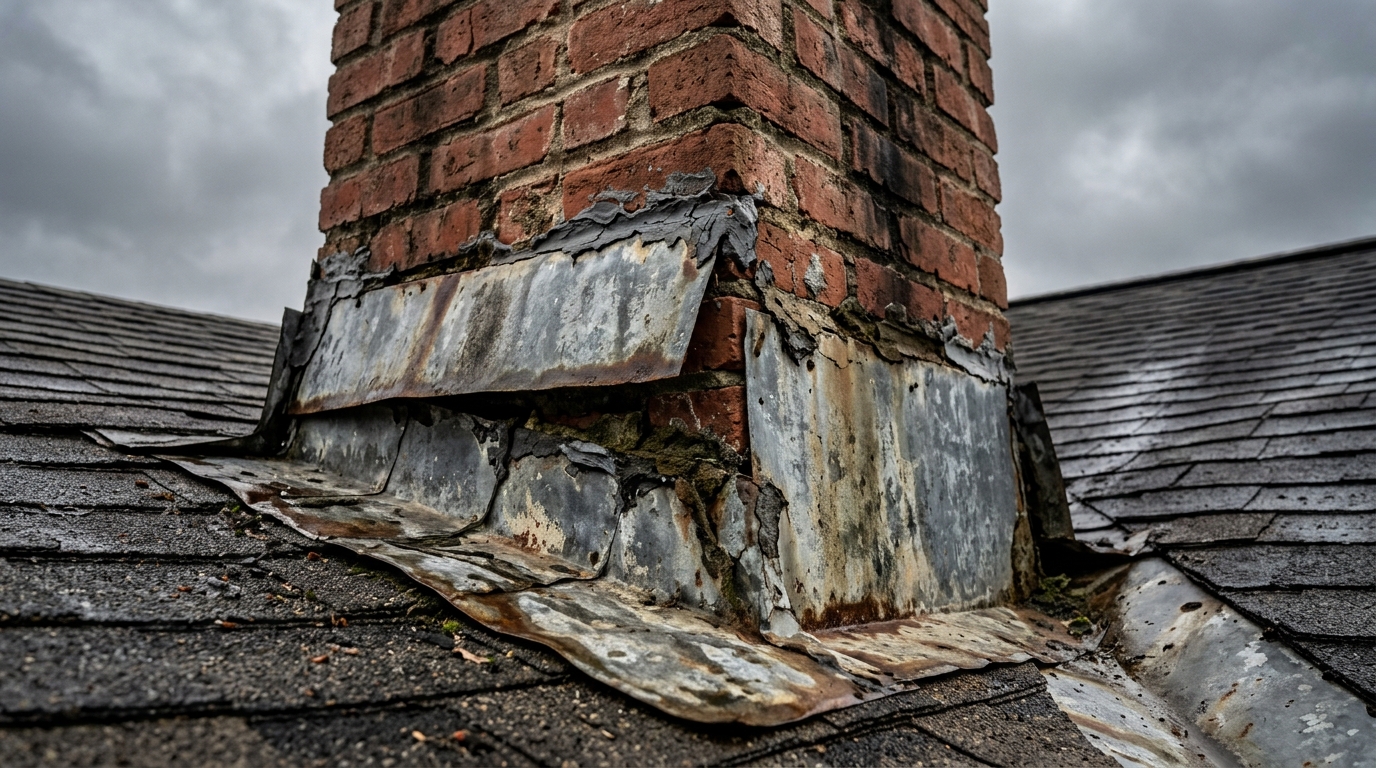
When homeowners think about roof problems, they usually picture missing shingles or damaged tiles. Flashing rarely crosses their mind until water appears on a ceiling or wall. That oversight can prove expensive, because failing flashing is one of the most common causes of roof leaks.
Roof flashing is thin metal installed at every transition point on your roof: chimneys, skylights, vent pipes, valleys, and wherever the roof meets a wall. Its job is simple but essential. Flashing directs water away from joints and seams where shingles alone cannot provide protection. When flashing fails, water bypasses your roofing material entirely and enters the roof structure directly.
Catching flashing problems early prevents the rot, mold, and structural damage that result from persistent moisture infiltration. This guide covers the five warning signs that tell you flashing is failing and explains what Allen homeowners should do when they spot trouble.
What Is Roof Flashing and Why Does It Matter
Roof flashing is typically made from aluminum, galvanized steel, or copper. These thin metal pieces are installed at every vulnerable intersection on your roof where water could potentially enter. Shingles overlap to shed water down the roof surface, but they cannot fully seal the gaps around chimneys, pipes, skylights, and other penetrations. Flashing bridges these gaps and channels water safely onto the shingles below.
You will find flashing in several critical locations: around chimneys where the masonry meets the roof, surrounding skylights, at vent pipes and exhaust fans, in roof valleys where two slopes meet, along dormers, at roof-to-wall transitions, and as drip edges along the perimeter. Each location uses a specific flashing configuration designed for that particular intersection. During any roof installation, proper flashing work is just as important as the shingles themselves.
Without functioning flashing, water seeps into the roof deck, saturates insulation, rots framing members, and eventually appears as stains or active drips inside your home. The damage often spreads for months before you notice anything wrong. That hidden deterioration is why flashing deserves regular attention even when your shingles look fine.
Sign 1: Water Stains on Ceilings or Walls
Brown or discolored patches on your ceiling or walls are often the first visible evidence of a flashing problem. These stains typically appear near chimneys, skylights, or where the roof meets exterior walls. However, the stain location does not always indicate the exact entry point. Water can travel along rafters, decking, or insulation before showing up inside, sometimes appearing feet away from where it actually entered.
Pay particular attention to stains that appear only during heavy rain or wind-driven storms. Wind pushes rain horizontally, forcing water under lifted flashing edges that might stay dry during gentle vertical rainfall. If you experience leaks only during certain weather conditions, flashing is a likely culprit.
Many homeowners have shingles repaired only to see the leak return during the next storm. This often means the real problem was flashing beneath the shingles, not the shingles themselves. If you have addressed shingle damage but the leak persists, schedule professional roof repairs to investigate the flashing system.
Sign 2: Visible Rust, Corrosion, or Discoloration
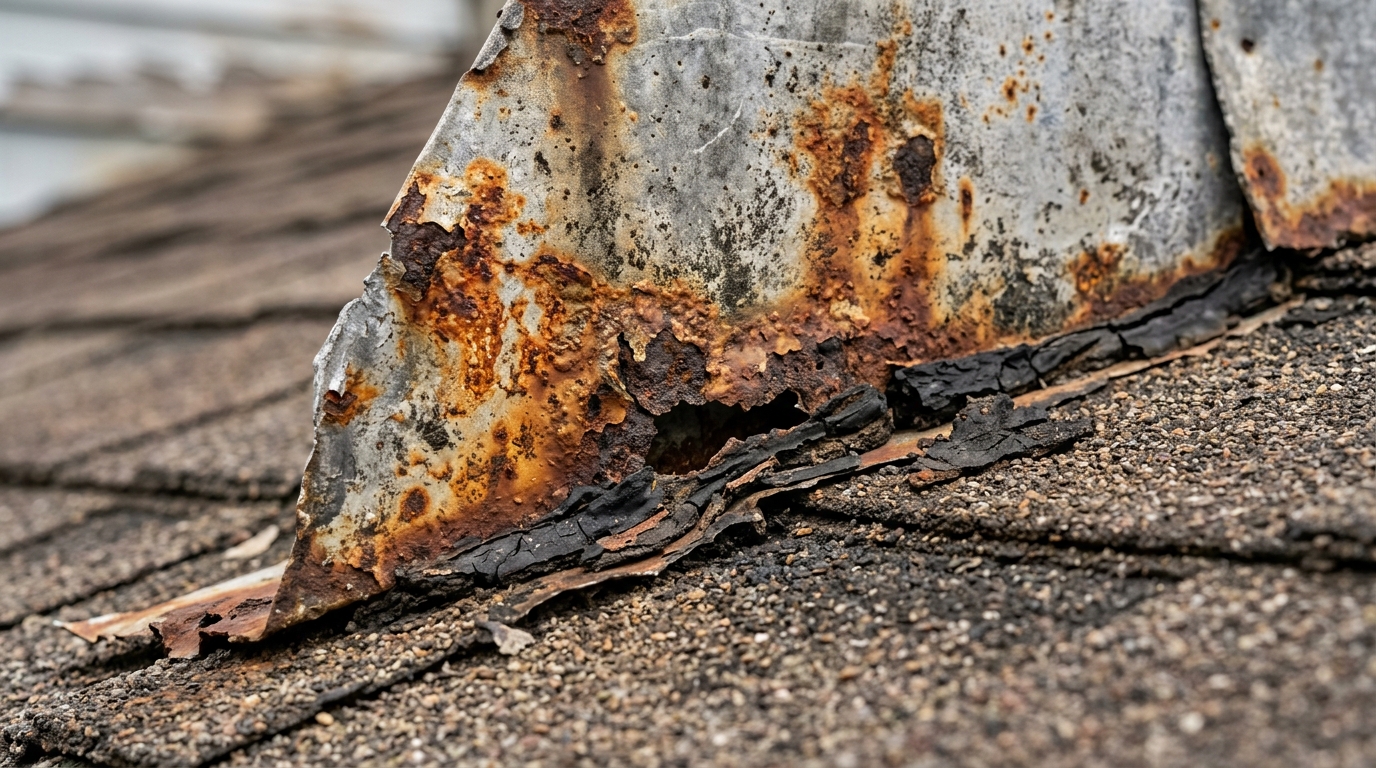
Metal flashing is designed to resist corrosion, but no protective coating lasts forever. Galvanized steel eventually develops rust. Aluminum can corrode in certain conditions. Even copper, while highly durable, can develop issues at seams and joints. Texas humidity accelerates these processes, especially once the factory finish begins to break down.
Orange or brown discoloration on flashing indicates the protective coating has failed and the underlying metal is deteriorating. Once rust develops, the flashing loses its waterproofing ability. Small holes form. Rust spreads. What starts as surface discoloration becomes a leak waiting to happen.
You can check flashing conditions from ground level using binoculars, during gutter services, or by examining photos taken from a ladder at a safe distance. Look at flashing around chimneys, vent pipes, and along roof edges. Any visible rust or pitting warrants closer professional inspection before the next heavy rain.
Sign 3: Cracked, Bent, or Missing Flashing Sections
Physical damage to flashing is sometimes visible from the ground. Look for metal that appears bent, dented, cracked, or obviously displaced from its original position. Missing sections leave roof penetrations completely unprotected and require immediate attention.
Several forces cause this type of damage. Hail dents and cracks flashing, sometimes creating small holes that are invisible from the ground but allow water entry. High winds can lift, bend, or tear flashing loose from its fasteners. Fallen branches knock flashing out of position. Even normal foot traffic from cable installers or HVAC technicians can bend flashing if they step in the wrong places.
Texas temperature extremes also stress metal over time. Flashing expands in summer heat and contracts during winter cold. These constant cycles stress seams, loosen fasteners, and create gaps that were not present when the flashing was installed. After several years of Texas summers and winters, even properly installed flashing may develop small separations at joints and edges.
Sign 4: Flashing Pulling Away or Loose
Flashing that has separated from the chimney, wall, or roof deck is no longer doing its job. Even a small gap allows water to enter, and gaps tend to widen over time as weather continues to work on the loose material.
Sealant is often the first component to fail. The caulk and roofing cement used to seal flashing edges deteriorate in Texas heat and UV exposure. Once sealant cracks or pulls away, the flashing itself can lift. Wind gets underneath. Water follows. What started as a sealant failure becomes a flashing failure.
Loose flashing is often visible as gaps between the metal and adjacent surfaces. Around chimneys, you might see the counter flashing pulling out of mortar joints. At roof-to-wall intersections, step flashing can separate from siding. Along drip edges, flashing may pull away from fascia boards. Schedule a professional roof inspection if you notice any of these separations developing.
Sign 5: Shingle Damage Near Flashing Areas
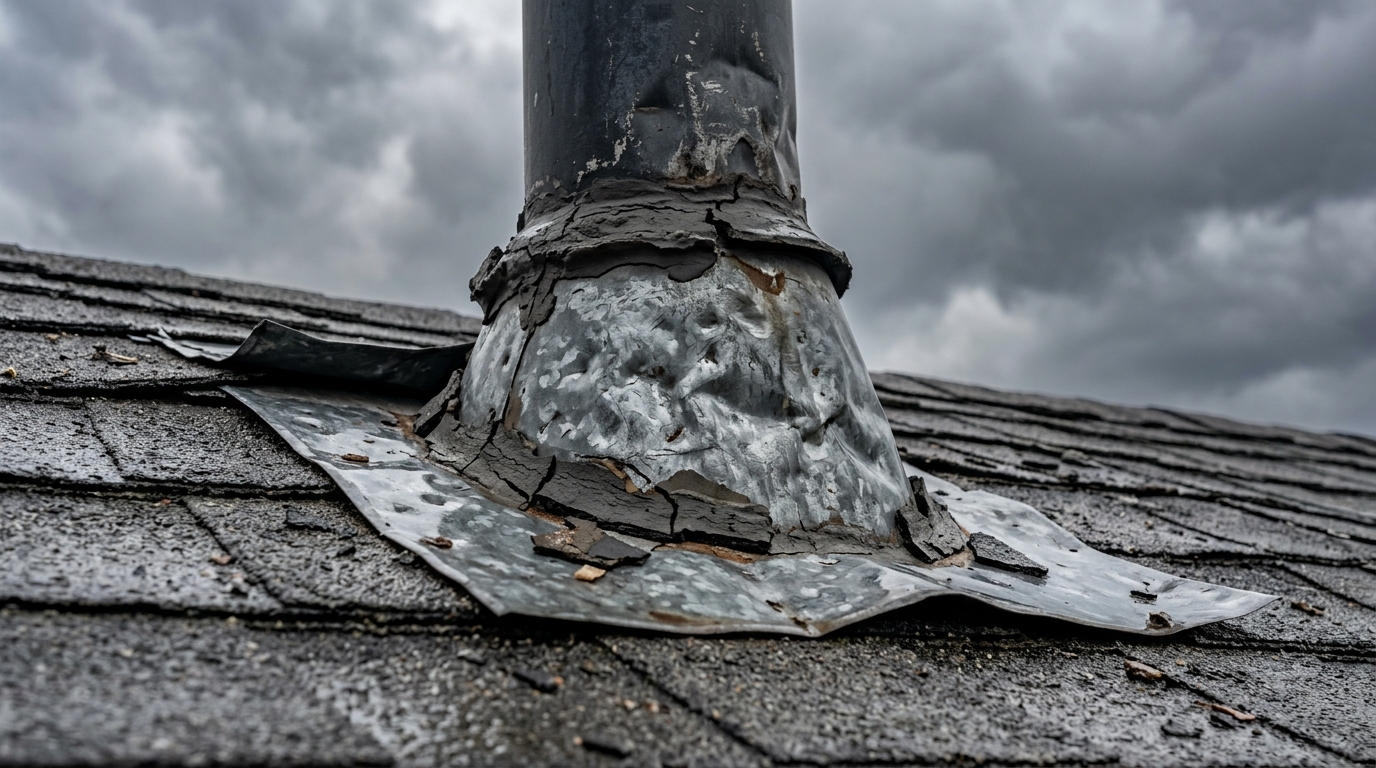
Sometimes the most visible evidence of flashing failure appears not on the flashing itself but on adjacent shingles. Look for curling, darkening, or missing shingles near chimneys, skylights, vents, and valleys. When flashing fails, water pools or backs up beneath the roofing material, damaging shingles from below where you cannot see it.
Shingles that appear to be shifting or lifting near roof penetrations often indicate underlying flashing problems. The moisture that causes this damage comes from failed flashing, not from the shingles themselves. Replacing affected shingle roofing without addressing the flashing issue results in the same damage recurring on the new shingles.
In some cases, shingle damage near flashing is the only visible sign of a problem until a leak appears inside. If you notice localized shingle deterioration around any roof penetration or transition point, have the flashing inspected even if it looks intact from the ground.
Why Texas Weather Is Hard on Flashing
Allen’s climate creates specific challenges for roof flashing that homeowners should understand.
Temperature extremes cause constant expansion and contraction. Texas can swing from near freezing to triple digits within the same week, and these thermal cycles stress metal and sealants with every swing. Over years, this constant movement loosens fasteners, opens seams, and degrades the tight seal flashing required to function.
Spring hailstorms are hard on flashing. Hail dents metal, cracks brittle sealant, and can knock flashing loose from fasteners. Even moderate hail that does not visibly damage shingles can create problems at flashing points that only become apparent during later rain events. If your area experienced hail, consider scheduling an emergency roofing inspection to assess flashing conditions.
Intense UV radiation degrades sealants faster than in milder climates. The roofing cement and caulk that seal flashing edges can dry out, crack, and lose adhesion after just a few Texas summers. Rubber boots around vent pipes are particularly vulnerable, often cracking within five to seven years of installation.
Wind-driven rain tests every weak point in your flashing system. Texas thunderstorms can push rain nearly horizontal, forcing water under lifted edges that would stay dry during gentle vertical rain. High humidity after storms accelerates corrosion once protective coatings have been compromised.
Common Flashing Problem Areas
Understanding where flashing problems typically develop helps you know where to look and what to watch for.
Chimneys are the most common source of flashing-related leaks. A chimney requires multiple flashing components: base flashing at the bottom, step flashing along the sides, counter flashing embedded in mortar joints, and often a cricket or saddle behind the chimney to divert water. Each component can fail independently. Mortar joints crack over time, allowing counter flashing to separate. Step flashing can corrode or pull loose. The complexity of chimney flashing systems means more potential failure points.
Skylights are another frequent trouble spot. These require multi-piece flashing systems that integrate with surrounding shingles. Homeowners often blame the skylight itself when leaks appear, but the flashing around the skylight is usually the actual culprit. Skylight flashing is particularly susceptible to sealant failure because of the large perimeter that must be sealed. Similar principles apply to tile roofing installations where complex flashing systems protect valleys and penetrations.
Vent pipes use rubber boots that degrade in Texas sun faster than other flashing components. The rubber cracks, shrinks, and eventually allows water to run down the pipe into your attic. These boots often need replacement before the surrounding roof materials show any wear.
Roof valleys channel large volumes of water during every rain. Valley flashing failure causes serious leaks quickly because of the concentrated water flow. A small gap or lifted edge in valley flashing allows substantial water entry during storms.
What to Do When You Spot Flashing Problems
If you notice any of the warning signs discussed above, take appropriate action before a small problem becomes a major repair.
Do not climb on your roof to investigate. Roof work presents serious safety risks, and walking on roofing materials can cause additional damage. Leave the close inspection to professionals who have proper equipment and training.
Document what you can see from the ground. Photos taken with a phone camera, especially using zoom, help roofers assess the situation before they arrive. Note when you first noticed the issue and whether it correlates with specific weather events.
Schedule professional inspection promptly. Small flashing issues become major water damage quickly, especially during Texas storm season. A GAF Master Elite certified contractor can assess the full scope of the problem, including hidden damage you cannot see from the ground.
Avoid DIY caulk fixes. Homeowners sometimes apply roofing sealant to visible gaps as a temporary measure. While understandable, this approach often masks problems while water damage continues underneath. Caulk applied over failing flashing creates a temporary cosmetic improvement that delays proper repair and can make eventual repair more difficult.
Check your attic for moisture if you can access it safely. Look for daylight showing through the roof deck near penetrations, damp insulation, water staining on rafters, or musty odors. These signs indicate water has been entering for some time, even if ceiling stains have not yet appeared.
What Flashing Repair Typically Costs
Flashing repair costs vary based on location, extent of damage, roof accessibility, and whether underlying water damage exists. Here are typical ranges for common repairs.
Minor repairs such as resealing loose flashing or replacing deteriorated sealant typically cost $150 to $300. These fixes address early-stage problems before the flashing itself fails. Vent pipe boot replacement runs $150 to $500 depending on pipe size, roof pitch, and accessibility.
Chimney flashing repairs range widely. Minor sealant work and reattaching loose counter flashing costs $300 to $600. Full chimney flashing replacement, which involves removing shingles, installing new base flashing, step flashing, and counter flashing, typically runs $500 to $1,500 depending on chimney size and roof complexity.
Valley flashing repair or replacement costs $400 to $1,000 or more because valleys require removing and replacing shingles on both adjacent roof slopes. Skylight flashing repair typically falls between $300 and $700. These costs increase significantly if water damage has spread to roof decking, insulation, or framing.
Early repair is always less expensive than addressing the consequences of delayed repair. The cost of replacing water-damaged decking, remediated mold, or repairing interior finishes dwarfs the cost of timely flashing repair. For extensive damage, full roof replacement may become necessary if deterioration has spread too far.
Schedule a Flashing Inspection Today!
Have you noticed water stains, rust on your flashing, or any of the warning signs discussed in this guide? Do not wait for a small problem to become expensive water damage. Contact Pickle Roofing Solutions for a professional flashing inspection and repair estimate. Call (469) 247-8310 or visit our contact page to schedule your evaluation today.
Frequently Asked Questions
How long does roof flashing last?
Most flashing lasts 15 to 25 years depending on material, installation quality, and weather exposure. Aluminum and galvanized steel fall on the shorter end of that range in Texas conditions. Copper flashing can last 50 years or more. Sealants and rubber components typically need attention before the metal itself fails, often within 5 to 10 years in Texas heat.
Can I repair flashing myself?
While minor sealant touch-ups are possible for handy homeowners comfortable on ladders, most flashing repair is best left to professionals. Proper flashing installation requires specific techniques, overlapping sequences, and integration with surrounding roofing materials. Incorrect repairs often cause more problems than they solve and can void roofing warranties. The safety risks of roof work also favor professional service.
Is flashing replaced during roof replacement?
Reputable contractors replace flashing during full roof replacement. However, this should be confirmed in writing before work begins. Some contractors attempt to reuse existing flashing to save costs, which can lead to early leaks on your new roof. Always verify that your contract includes new flashing at all penetrations, valleys, and edges.
What causes flashing to fail?
The most common causes are improper installation, weather damage, thermal expansion and contraction, sealant deterioration, rust and corrosion, and physical damage from hail or debris. Poor installation is the leading cause of premature failure. Flashing installed without proper overlap, inadequate sealant, or incorrect fastening will fail years before properly installed flashing.
Does homeowner’s insurance cover flashing repairs?
Insurance typically covers flashing damage caused by covered perils such as hail, wind, or falling trees. It does not cover damage from normal wear, aging, or lack of maintenance. If a storm damaged your flashing and caused interior water damage, both the flashing repair and interior damage may be covered. Document the damage thoroughly and file claims promptly within policy deadlines.
How often should flashing be inspected?
Annual inspection is recommended, ideally in spring before storm season. Additional inspection after significant hail events, high wind storms, or any time you notice interior water stains is prudent. Catching problems early when they require only minor repair prevents the expensive water damage that results from neglected flashing failure.
About Pickle Roofing Solutions
Pickle Roofing Solutions is a trusted roofing contractor in Allen serving homeowners throughout the Dallas-Fort Worth metroplex. Our team specializes in diagnosing and repairing flashing failures that cause persistent roof leaks. We provide thorough inspections that identify not just visible problems but hidden damage that has developed over time, along with honest recommendations that protect your home and your budget.